HDB Interior Design Singapore: Layering Your Lights
In HDB interior design Singapore projects, lighting is the cheapest way to change how a flat feels and the easiest thing to get wrong. New BTO flats hand over with a bare bulb holder in each room. Once you rewire, that layout is locked in for years, so plan the layers before the electrician chases a single wall.
What layering actually means in a 90 sqm flat
Layered lighting means three jobs handled by different fittings instead of one ceiling light trying to do everything. Ambient light fills the room. Task light lands where you work. Accent light picks out a surface or object.
A typical 4-room flat at about 90 sqm has a living and dining zone, a kitchen, three bedrooms, and two bathrooms. If you install one central light per room, you get flat, shadowless brightness at night and dead corners everywhere else. Swap to layers and the same flat reads warmer and larger.
- Ambient: cove lighting, ceiling-mounted panels, or a set of evenly spaced downlights.
- Task: under-cabinet strips in the kitchen, a reading light at the bed, a desk lamp at the study nook, a mirror light in the bathroom.
- Accent: track spots aimed at a feature wall, a strip under a floating console, a pendant over the dining table.
You do not need all three in every room. Bedrooms usually need ambient plus task. Living rooms benefit from all three. Bathrooms need good task light at the mirror above anything else.
Plan the circuits before the walls close
Electrical work happens early, right after hacking and masonry. Once tiles and skim coat go on, moving a switch means breaking a finished wall. Here is the sequence I use with clients.
- Draw a furniture plan first. Not a mood board, an actual scaled plan with the sofa, bed, dining table, and wardrobe in position.
- Mark where you sit, sleep, cook, and work. These are your task points.
- Place task fittings directly over those points. A pendant should sit centred on the dining table, not centred on the room.
- Space downlights for ambient fill at roughly 1.2m to 1.5m apart, kept about 60cm off the wall so the beam washes the wall rather than the skirting.
- Decide your switching zones. Separate the cove from the downlights, and separate the TV wall accent from both. Three gangs at the living room entry is normal.
- Add two-way switching for the bedroom. One switch at the door, one at the bedside, so you are not walking across a dark room.
- Confirm socket positions at the same time. Bedside sockets at 700mm above finished floor level sit above a platform bed instead of behind it.
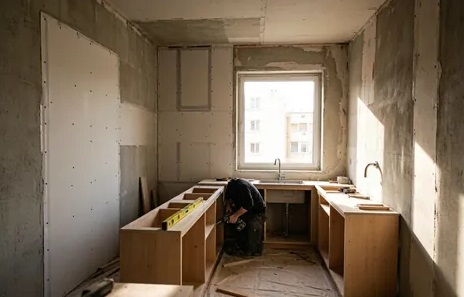
Give this plan to your contractor before the permit stage. You need an HDB renovation permit before works begin and processing takes about two weeks, so the paperwork window is exactly when the lighting plan should be finalised. Your firm must be an HDB Licensed Renovation Contractor in the HDB Directory of Renovation Contractors for the application to go through.
Colour temperature and brightness for Singapore homes
Most homeowners pick fittings by looks and ignore the two numbers that decide the mood. Kelvin sets warmth. Lumens set brightness.
For living and dining, 3000K reads warm and relaxed while staying clear enough to read by. Bedrooms sit comfortably at 2700K to 3000K. Kitchens and bathrooms handle 4000K well because you want to see what you are chopping and how your face looks in the mirror. Going to 6000K across a whole flat gives that office corridor feeling, and it is the single most common complaint I hear after handover.
On brightness, aim for roughly 300 lumens per square metre in living areas and 500 in kitchen work zones. A 90 sqm flat living and dining area of about 25 sqm needs somewhere near 7500 lumens spread across ambient and task, not one 20W bulb.
Keep colour temperature consistent within a sightline. If your open concept kitchen shares a view with the dining table, running 4000K in one and 3000K in the other looks like a mistake even when both are correct on their own. Either match them or place a physical break such as a bulkhead line between the zones.
Room by room in a real HDB layout
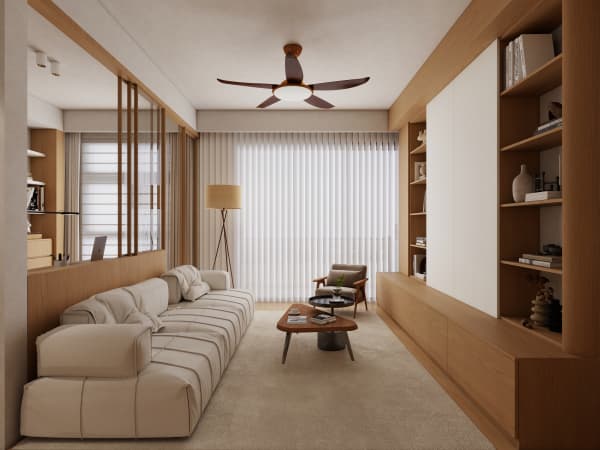
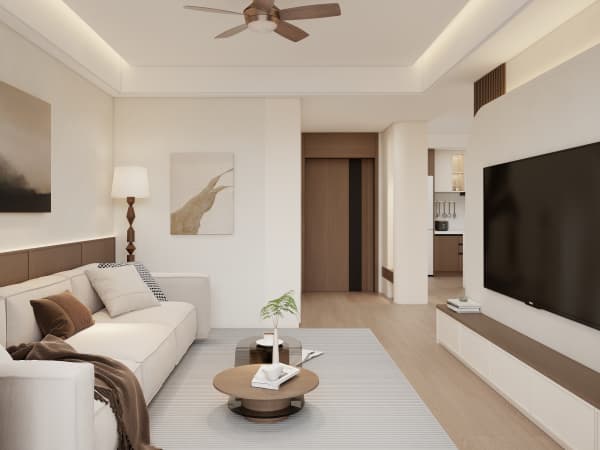
Living room. Run a cove along one or two sides rather than the full perimeter. A full box cove drops the ceiling everywhere and makes 2.6m feel like 2.4m. Add four to six downlights for general fill and a track of two or three adjustable spots aimed at the feature wall. Put the cove on its own switch. On most evenings that cove alone is enough.
Dining. One pendant or a linear fitting hung 75cm to 85cm above the tabletop. Measure from the table surface, not the floor. If your table can extend, use a linear fitting rather than a single round pendant so the light still covers the extension.
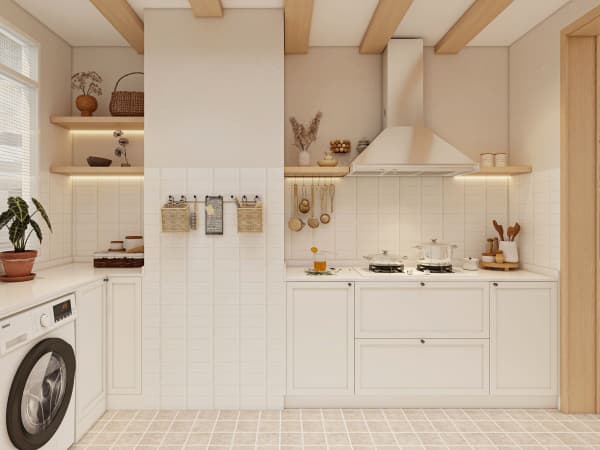
Kitchen. Under-cabinet LED strips are non-negotiable. Overhead downlights put your own shadow on the chopping board. Mount the strip toward the front edge of the wall cabinet, behind a small lip, so you see the light and not the diode. New BTO kitchens are induction-ready, and if you keep gas it runs under SP and SCDF rules, so confirm appliance positions before you fix the strip locations.
Bedrooms. Skip the single centre downlight over the bed. Light from directly above your face is uncomfortable when you lie down. Use perimeter downlights plus wall-mounted reading lights or a cove above the headboard. Platform beds with storage sit low, so a pendant at 1.2m above floor beside the bed works nicely and frees the side table.
Bathrooms. Put the main light at the mirror, vertically flanking it or as a horizontal strip above. Add one waterproof-rated downlight in the shower area. Both bathrooms in a BTO come with basic fittings, so budget for the mirror light as an addition.
Household shelter. This is the one space with a hard limit. The shelter is not renovated. Light fittings and laminated flooring inside are permitted, and the door stays as installed. A simple surface-mounted LED is the sensible choice, and no false ceiling goes in there.
How HDB interior design Singapore rules affect lighting works
Lighting changes involve chasing walls, and chasing is noisy. Hacking and drilling are restricted to weekdays from 9am to 6pm, with none on Sundays or public holidays. In an occupied resale block that means your electrical phase spreads over more calendar days than a vacant BTO.
You also cannot chase into structural walls, beams, columns, or slabs. Where a switch position falls on a structural wall, the run goes surface-mounted in a trunking or gets rerouted through the ceiling. Your contractor should flag this at planning, not on site.
Cost sits inside the wider budget. As market ranges, a 4-room BTO renovation is about S$30,000 to S$45,000, and a resale flat of the same size about S$50,000 to S$70,000 given the extra hacking and rewiring. Electrical and lighting typically take a meaningful slice of that, and full rewiring in an older resale flat is worth doing once rather than patching.
Fold the works into your BTO renovation timeline like this.
- Permit submitted, roughly two weeks processing.
- Hacking and masonry.
- Electrical first fix, all conduits and back boxes.
- Plastering and false ceiling framing.
- Flooring and painting.
- Electrical second fix, fittings installed and tested.
- Carpentry, with integrated strips wired into pre-run points.
Details that separate a good job from a rushed one
- Use dimmable drivers on the living room cove and dining pendant. The same room then works for a family dinner and a late film.
- Ask for a lighting schedule listing every fitting with wattage, Kelvin, and beam angle. It prevents a mixed bag of bulbs arriving on site.
- Choose 24 degree beams for accent spots and 60 degree for general downlights. Everything at 60 degrees gives you a wash with no focus.
- Integrate strips into carpentry at the drawing stage. Wardrobe interior lights, a strip under the platform bed edge, and a light inside a pull-out pantry all need a power point planned before the cabinet is built.
- Check the driver location. Put drivers where you can reach them through a service hatch, because they fail before the LEDs do.
Lighting only lands correctly when it is drawn together with carpentry, ceiling lines, and furniture positions on the same plan. That is the argument for whole-house customization. When one team dimensions the wardrobe, the bulkhead, the socket heights, and the beam angles at the same time, you get switches where your hand reaches and light where your eyes need it. Send us your floor plan and how you actually use each room, and we will build the lighting layers around that.