HDB Interior Design Singapore: Smart Home Wiring
HDB interior design Singapore conversations now include smart lighting, sensors and app-controlled aircon almost by default. New BTO flats come induction-ready in the kitchen and carry more data provisions than blocks built a decade ago. The wiring decisions you make during renovation determine whether your smart home feels effortless or turns into a drawer of dead hubs.
Wired backbone or wireless devices: pick before carpentry
There are two honest paths. A wireless setup uses Wi-Fi and Zigbee devices that replace existing switches and plugs, needing only a neutral wire at each switch box. A wired setup runs dedicated cabling from a central point to lights, curtains and sensors, giving you control that survives router problems and internet outages.
For most HDB flats, the practical answer is a hybrid. Run structured cabling to the points that are painful to retrofit, and use wireless devices where a battery or plug-in unit does the job.
- Hard to retrofit, so wire it now: curtain motors, ceiling lights on multi-way control, video door station, ceiling-mounted sensors, network points behind the TV and in each bedroom.
- Easy to add later, so stay wireless: smart plugs, table lamps, temperature sensors, door contact sensors, smart speakers.
- Non-negotiable at wiring stage: a neutral wire at every switch box. Older HDB switch boxes carry live and switched live only, and most smart switches will not work without neutral.
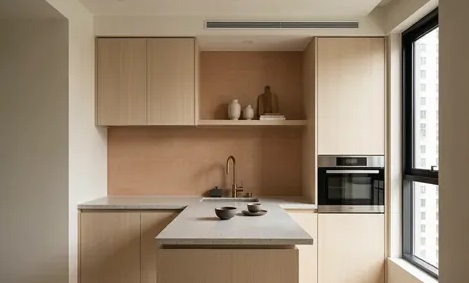
Step by step smart wiring during an HDB renovation
The sequence is unforgiving. Cables go in before plastering, and plastering happens before painting and carpentry. Miss the window and you are running trunking along a finished wall.
- Engage an HDB Licensed Renovation Contractor from the HDB Directory of Renovation Contractors, and confirm your electrical works are handled by a licensed electrical worker.
- Submit the HDB renovation permit for any hacking and wiring works. Allow about 2 weeks for processing before site start.
- Walk the empty flat with a floor plan and mark every switch, socket, sensor and network point on the wall in pencil at actual height. Do this physically, not on a screen.
- Decide your network cabinet location. A ventilated cabinet near the DB box or inside a store area works. Avoid the household shelter, which is not renovated beyond light fittings and laminated flooring, and never a sealed carpentry box with no airflow.
- Run Cat6 from the cabinet to each TV point, study desk, bedroom and ceiling access point for the Wi-Fi access point. Two runs to the living room, one spare.
- Pull neutral to every switch position, and pull an extra conduit to curtain track ends and the main bedroom headboard wall.
- Chase conduits into non-structural walls only. Structural walls, beams, columns and slabs cannot be hacked, so surface conduit above the false ceiling is the alternative there.
- Photograph every wall with conduits exposed before plastering. Label the photos by room. You will need them when someone drills for a shelf.
- Test every point with a cable tester after plastering, before tiling and painting.
Drilling and hacking follow HDB noise rules: weekdays 9am to 6pm, and none on Sundays or public holidays. Chasing conduits across a 4-room flat of about 90 sqm generates several days of that noise, so it belongs early in the programme alongside the other loud trades.
Where smart points actually earn their keep in HDB interior design
I have seen flats with forty smart devices where the owner uses six. Spend the budget where daily habits live.
- Entrance: a smart lock with a keypad, plus a sensor light in the shoe area. Run power to the door frame if you want a video door station rather than a battery unit.
- Living room: motorised curtains on the main window. This needs a socket at the curtain track end and a proper pelmet depth of at least 200mm to hide the motor.
- Kitchen: an under-cabinet lighting circuit on a separate switch, and a socket inside the pantry cabinet for a charging shelf. New BTO kitchens are induction-ready, and induction hobs need their own dedicated circuit sized correctly.
- Bedrooms: two-way control at the door and at the bedside, so you never walk across a dark room. A bedside USB socket beats a wall wart every time.
- Bathroom: a motion sensor for the night light and a timer for the exhaust fan. Keep all controls outside the shower splash zone.
- Service yard: a water leak sensor near the washing machine tap. Cheap, and it has saved more than one ceiling below.
Working around HDB structural and safety rules
Smart home ambition runs into physical limits fast. You cannot hack structural walls, beams, columns or slabs to hide cables, and the household shelter stays as it is with only light fittings and laminated flooring permitted inside. Route around them using ceiling voids, floor skirting conduits or a bulkhead.
Window grilles are another point people forget. HDB requires grilles on upper-floor windows for child safety and regulates their removal. If you are planning a smart window opener or a sensor on the window frame, the grille stays and your device has to work with it.
Balconies in newer BTO flats from around 2019 onward cannot be enclosed. Any outdoor smart lighting or sensor there needs a weather rated enclosure, because the space stays open to rain.
Budget reality and future proofing
Smart wiring is not a separate project. It is a line item inside your electrical scope. A 4-room BTO renovation sits around S$30,000 to S$45,000 as a market range, and resale runs around S$50,000 to S$70,000 with heavier rewiring involved. Adding neutral wires, extra Cat6 runs and curtain motor provisions is a modest increment while the walls are open, and expensive once they are closed.
Two habits keep the system alive long term. Keep a printed point schedule inside the DB cabinet listing every circuit and network run. And choose devices that support a common local standard rather than a single closed app, so a discontinued product does not strand your switches.
The flats where smart home works quietly in the background are the ones where the electrical plan, the carpentry drawings and the false ceiling layout were drawn together. A curtain motor needs pelmet depth. An access point needs a ceiling plate. A hidden network cabinet needs ventilation the carpenter has to build in. Whole-house customization puts the electrician, the carpenter and the designer on the same drawing set, so every cable lands where a real device will sit. Sit down with a designer, list how your household moves through the flat from morning to night, and let the wiring follow that instead of a product catalogue.